
BASEMENT WATERPROOFING · TIFFIN, OH
Crawl Space Encapsulation in Tiffin, OH
A dirt-floor crawl space constantly introduces dampness into your living areas because natural air circulation draws lower air upward. Installing an encapsulation system involves securing a durable, reinforced barrier over the ground and foundation walls, sealing all joints, and adding an appropriately sized dehumidifier. In Tiffin, seasonal high water tables and the Sandusky River stage frequently saturate the underlying soil, making an unsealed crawl space a leading source of indoor mustiness without any obvious puddles. Reach out at (419) 406-4560 to schedule a complimentary on-site evaluation.
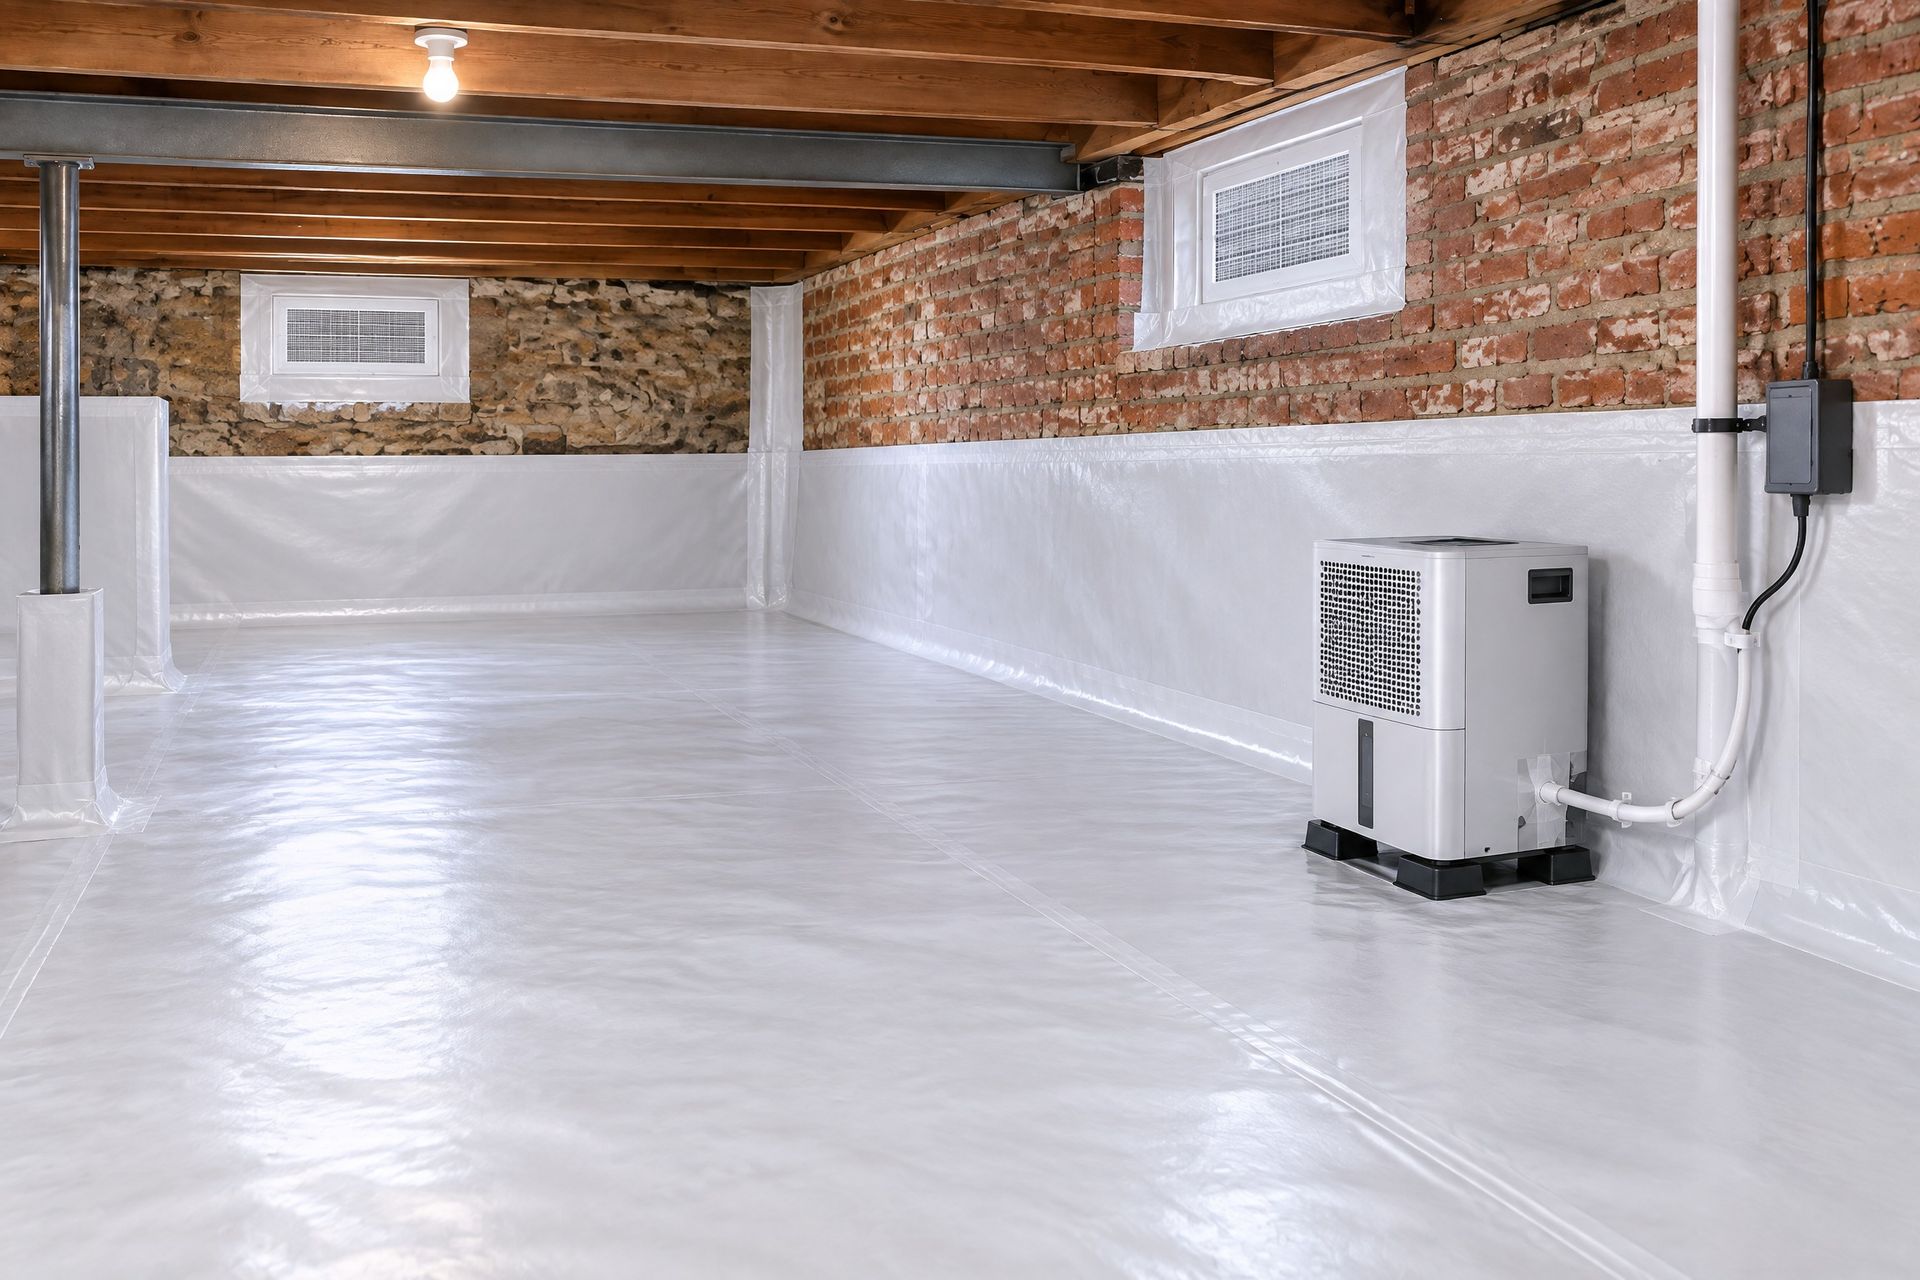
The crawl space encapsulation process explained
Our first step is always clearing out the area, which means removing degraded insulation, random debris, and any standing water or biological matter from the ground. If we find active pooling, we install proper drainage and a sump pump beforehand, as placing a barrier over accumulated water will only trap it rather than solve the issue. Following that, we lay down a robust polyethylene membrane across the dirt, extend it up the perimeter walls, and secure it mechanically to a termination bar instead of relying on tape. We overlap and seal every single joint, and carefully cut and adhere the material around support columns to ensure a complete barrier.
Simply putting down a barrier is not enough to complete the transformation. After isolating the space from ground moisture, we must manage the dampness trapped in the air, which requires installing a dehumidifier matched to the area's volume and routing its discharge line to a drain. We also close off the exterior vents. While older building practices recommended ventilating crawl spaces, doing so during an Ohio summer allows warm, sticky outdoor air to enter and condense on the cooler surfaces below your floor, creating a wetter environment. A closed, conditioned space remains dry, whereas an open one in our region will not.
Indicators that your home requires crawl space encapsulation
Issues beneath your floorboards typically present symptoms in your main living areas, often leading to incorrect diagnoses.
- Persistent musty odors inside the house that intensify during sticky weather and linger near HVAC registers
- Floorboards that seem unusually cold or moist to the touch, or wood flooring that has started to warp or buckle
- Noticeable water droplets forming on pipes, air ducts, or the wooden framework beneath the first floor
- Batts of fiberglass insulation that have become heavy with moisture, turned dark, or dropped out of place
- Bare earth visible beneath the house, or a flimsy plastic sheet that has ripped, shifted, or degraded
- Signs of mildew on the subfloor, or fungal patches developing on the wooden structural components below
Get Your Free Quote
The reasons Tiffin crawl spaces struggle with dampness
The soil conditions beneath Tiffin properties are strongly impacted by the Sandusky River and regional groundwater patterns. Even for homes situated well outside designated floodplains, the combination of seasonal water table changes and river fluctuations can leave the earth under your foundation saturated for extended periods. This moisture continuously vaporizes from the bare dirt into the confined space above it. An unprotected earth floor can introduce an astonishing amount of water vapor into your living environment over a few months, completely unnoticed because no puddles ever form.
That airborne dampness does not remain trapped below the floorboards. The natural stack effect in residential buildings causes warm indoor air to rise and exit through the upper levels, pulling replacement air from the lowest available source, which is the crawl space. Consequently, a significant portion of the air circulating in your living room originated from the dirt below, bringing along its humidity and odors. The summer heat in Tiffin exacerbates the situation, as the outdated practice of opening foundation vents draws hot, sticky air into the cooler sub-floor area, leading to immediate condensation on cold pipes and wood. This explains why many local residences experience worse moisture problems in July than during spring showers.
Factors influencing crawl space encapsulation prices in Tiffin
Costs depend largely on the total area, modified by accessibility and required preparation work. See our pricing page for expected ranges.
- The total square footage of the earth floor and the perimeter walls requiring coverage
- Clearance heights and ease of entry — working in a tight eighteen-inch gap is more labor-intensive than a four-foot space
- The extent of preparation needed, such as hauling out ruined insulation, trash, or biological matter
- The necessity of installing a sump pump and drain tile system prior to laying the membrane
- The required output of the dehumidification unit and the complexity of routing its drain line
- The quantity of support columns and utility pipes that require custom cutting and sealing work
Understanding the difference between encapsulation and a vapour barrier
A vapour barrier consists of a basic plastic sheet spread loosely over the dirt. It offers some improvement over bare earth and is quite affordable, and if your sub-floor area is truly dry with only minor seasonal dampness, it might suffice. However, it is not an encapsulation system. A loose sheet does not extend up the foundation walls, lacks sealed joints, shifts out of place when disturbed, and leaves the edges exposed, allowing significant moisture to bypass it. Certain companies will quote you for a simple barrier while calling it encapsulation, but the lower price tag usually reveals what they intend to install.
True encapsulation treats the area as a comprehensive system: a heavy-duty membrane covers the ground and walls, anchored securely at the top edge, with every joint and pipe penetration meticulously sealed, exterior vents blocked, and a dedicated dehumidifier managing the air quality. The goal is not merely laying down plastic, but completely severing the connection between your home's interior, the damp earth, and the outside weather. Given Tiffin's specific climate and soil characteristics, this comprehensive approach is often necessary to prevent recurring issues. We will provide an honest assessment if a basic barrier is adequate for your property, as we believe you should never purchase more protection than your home requires.
Our detailed installation methodology
STEP 1
Conducting a thorough on-site evaluation to measure moisture levels, inspect the wooden structure, and evaluate working clearances
STEP 2
Providing a firm, written estimate calculated from the exact dimensions and the amount of preliminary cleanup required
STEP 3
Executing the cleanout phase by removing degraded insulation, accumulated rubbish, and any organic materials
STEP 4
Installing necessary drainage and a sump basin if standing water is present, preventing moisture from being trapped under the new membrane
STEP 5
Positioning the heavy-duty barrier over the earth, extending it up the perimeter, and securing it firmly with a mechanical termination strip
STEP 6
Overlapping and bonding all material seams, and carefully tailoring and sealing the membrane around every support column and pipe
STEP 7
Blocking all exterior ventilation openings and setting up an appropriately sized dehumidifier, directing its discharge to a suitable drain
STEP 8
Confirming proper humidity reduction after the equipment is active, followed by a final review and photographic documentation of the completed work
Project duration and the installation experience
For most properties in Tiffin, the encapsulation process requires one to two days to complete. The primary variable is the initial cleanout phase — clearing out decades of accumulated debris and ruined insulation can consume an entire day before we even unroll the barrier. Fortunately, this process is much less intrusive than typical basement repairs: there is no jackhammering, no trenching through your yard, and our team accesses the workspace directly from the exterior whenever possible. You should notice an improvement in indoor air quality within a few days, although it may take a couple of weeks for the humidity to completely level out as the floor joists release their stored moisture. If your project includes installing a sump and drainage, expect the timeline to extend by an additional day. Because this is interior work, it is unaffected by the weather and can be booked during any season.
GOOD TO KNOW
FAQs
Is it better to keep foundation vents open or closed?
They should be closed in our region, despite this being the most frequent piece of obsolete guidance we encounter. The original logic assumed that outside breezes would carry away dampness, which is true in arid environments. However, during an Ohio summer, pulling warm, muggy air into a cooler space beneath your floor guarantees that condensation will form on the chilled pipes and wooden joists. Instead of drying the area, you are actively introducing water. A fully sealed space equipped with a dehumidifier maintains significantly lower moisture levels throughout the year.
Will this process eliminate the damp odors inside my living areas?
Yes, in the vast majority of situations, and the improvement is often remarkably fast. If the unpleasant smells originate beneath your floorboards — which is highly probable due to the upward movement of air in residential buildings — isolating the dirt and managing the airborne moisture eliminates both the water source and the environment where odors develop. Most homeowners observe a distinct difference within a matter of days. Should the smell linger after a few weeks of dehumidification, it indicates an additional source, and we will return to investigate further.
Is the plastic barrier sufficient on its own, or is a dehumidifier mandatory?
Both components are essential, and omitting the dehumidification unit is the primary reason these systems fail to deliver results. The membrane successfully prevents new moisture from rising out of the earth. However, it cannot extract the dampness already present in the air, the water absorbed by the wooden framework, or the humidity that sneaks in through small gaps around the perimeter. Without active moisture removal, a tightly sealed space can actually trap damp air longer than an open one. The mechanical dehumidifier is the crucial element that ensures the isolated environment remains dry.
How do you handle existing puddles or flooding under the house?
We must establish proper drainage before laying down any barrier material. Placing a membrane over accumulated water simply locks it against your foundation walls and support structure, preventing evaporation and causing more damage than leaving the dirt exposed. Our protocol requires installing a drain tile system and a sump pump to remove the water and dry the area before we proceed with the encapsulation. Any contractor who suggests covering up standing water without solving the underlying drainage issue is offering a destructive solution.
Is it safe to store belongings in the space after the work is done?
Absolutely, within sensible limits, and this is a secondary advantage many homeowners appreciate. A properly encapsulated area with regulated humidity will protect your stored items, unlike an exposed dirt floor which will quickly ruin them. We recommend keeping items elevated off the membrane when possible, utilizing plastic totes instead of cardboard boxes, and taking care not to drag heavy objects that could tear the material, as any punctures compromise the system's effectiveness. Just ensure you maintain clear access to the dehumidifier and the entry point.
Discover the condition of your sub-floor area
Complimentary on-site evaluation including moisture measurements and photographic documentation of the space beneath your home. Receive a firm written estimate and a straightforward recommendation on whether a basic barrier would suffice.